Implementing touch with Input System's Enhanced Touch API

User input is a core pillar of an interactive and engaging experience. Once you collect it, it’s important you present an experience that feels natural and intuitive to the player. In this tutorial, you’ll cover the basics of the new Unity Input System by creating a demo project that can:
- Place a 3D model by dragging it off the User Interface (UI) and dropping it into the world.
- Move the camera by dragging one finger.
- Zoom the camera by pinching two fingers.
Learning Outcomes
You’ll learn how to:
- Install the new Input System’s package.
- Enable Touch Simulation mode.
- Collect and process touch input via the EnhancedTouch API.
- Route Input System events to the UI.
Prerequisites
This tutorial was created with Unity version 2019.4.
- This tutorial assumes you already have basic knowledge of Unity and intermediate knowledge of C#.
- You need Unity 2019.4 or later to follow along with this tutorial.
- While you can enable simulation mode for testing, the behavior is unpredictable and only simulates a single touch. As a result, you also need a touch device to complete this tutorial.
Resources
- Check out How to make a configurable camera with the new Unity Input System if you want to learn more about Action Assets. You’ll build the camera rig used in this tutorial from scratch.
- You can also check out Inventory and Store System – Part 3 (Creating the Store UI) for a deeper look at the UI system.
- Input System documentation and GitHub repository.
- The UI icons are from Game-Icons.net.
Getting started
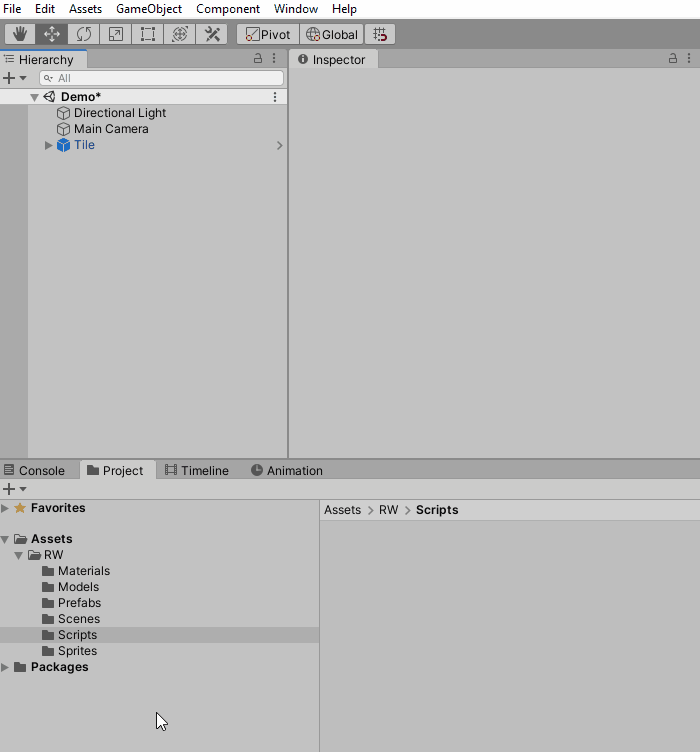
This tutorial relies on scripts and models that are included in the starter project. You can download the starter project by:
- Clone and/or download the GitHub repository.
- Navigate to the Implementing-touch-with-the-new-input-system\\projects\\starterProject folder in Unity.
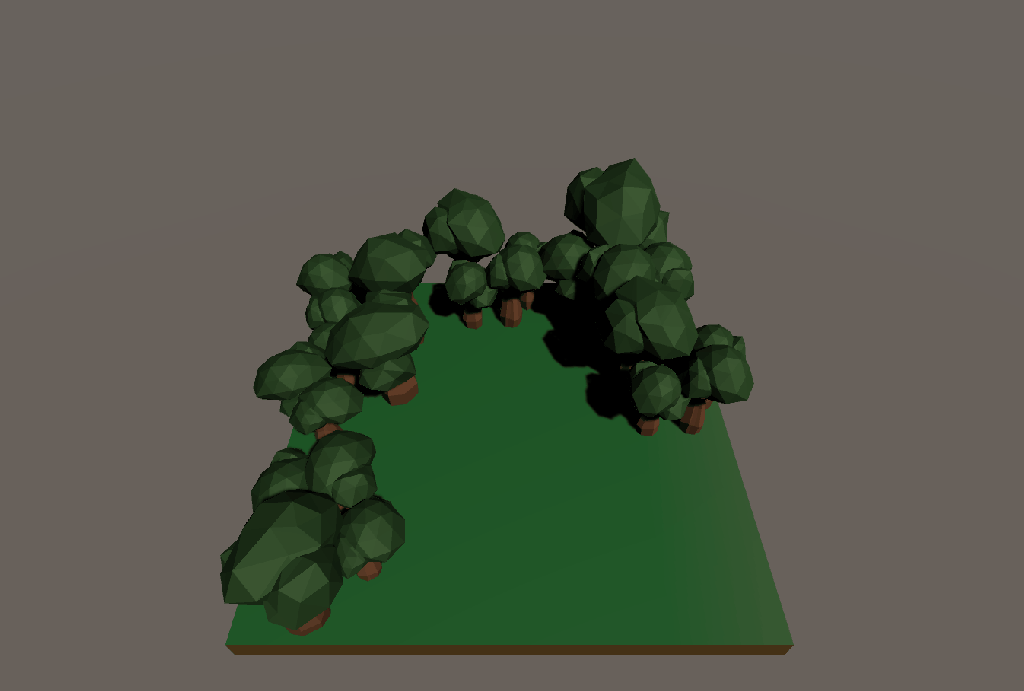
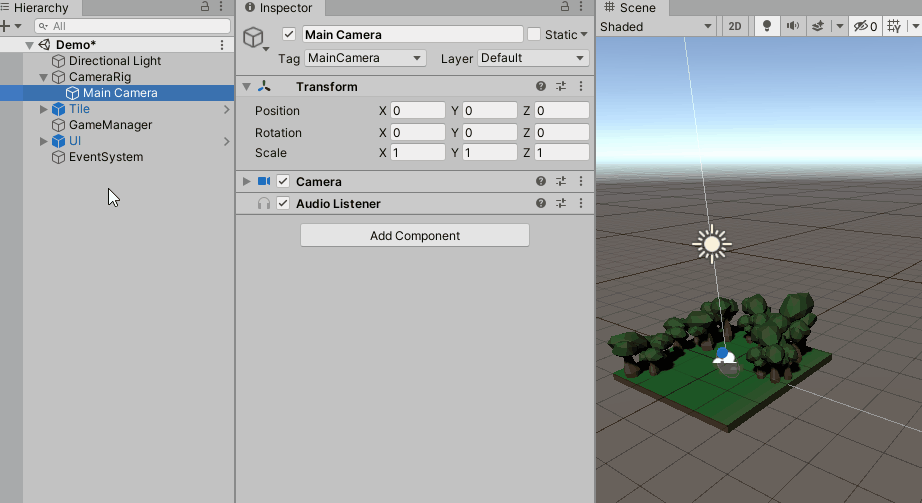
You’ll see Materials, Models, Prefabs, Scenes, Scripts and a Sprites folder in Assets/WUG. Open the Demo scene in Assets/WUG/Scenes.
Before you can start coding, you need to install the Unity Input system.
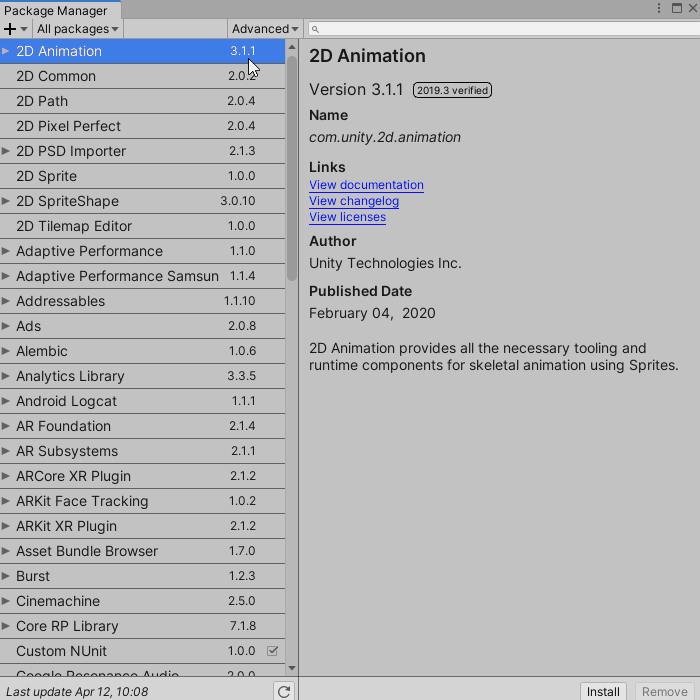
Installing the Unity Input System
Multi-platform games are becoming a staple in the gaming industry. The current input system doesn’t support anything beyond a simple configuration. To fix this, Unity has been overhauling the input system to create a more robust one that better supports multi-platform scenarios. To import it into your project:
- Go to Window ▸ Package Manager.
- In the search dialog, type Input System to search for the package.
- Select the Input System package and click Install.
- If prompted, enable the backend system. This requires a restart of Unity.
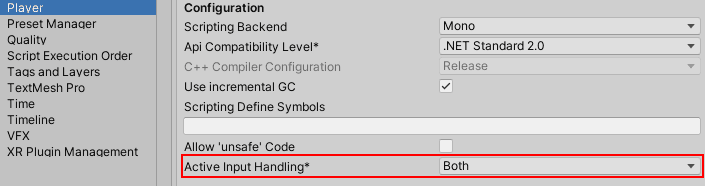
Some areas of Unity, such as the Universal Render Pipeline, still need the old input system to function. Luckily, you can have both input systems enabled. To tell Unity to use both input systems, do the following:
- Go to Edit ▸ Project Settings ▸ Player ▸ Other Settings.
- Set Active Input Handling to Both.
Enabling Touch Simulation Mode
The new Input system lets you simulate touch input from other kinds of devices, such as a mouse or pen. While helpful, this approach has two important limitations:
- Simulation results can vary from what you see on the actual device.
- You can only simulate a single finger.
Since you’ll add pinch logic for zooming, which requires two touchpoints, you can’t use simulation mode for this tutorial.
If you’re interested in simulation mode, you can enable it by going to Window ▸ Analysis ▸ Input Debugger. This opens the Input Debug window. In this window, select Options ▸ Simulate Touch from Mouse or Pen.
Now that you have the system installed, you can gather touch input.
Getting the touch input
As with anything that gives you deep control, there are several ways gather touch input. Rather than using the Input Action asset setup, which is great for multiple input device support, you’ll use the EnhancedTouchSupport API. This API is useful if you have many touch sources. To start, look at how you can get useful information on the touch actions taken.
- Right-click WUG/Scripts, select Create ▸ C# Script, and name it InputManager.
- Select GameObject ▸ Create Empty from the top menu.
- Name the new game object GameManager.
- Add InputManager as a new component to GameManager.
Open the script InputManager in your favorite code editor. Add these using statements right at the top of the file:
using UnityEngine.InputSystem.EnhancedTouch;
using Touch = UnityEngine.InputSystem.EnhancedTouch.Touch;
Then add an Awake method to enable Enhanced Touch Support:
private void Awake()
{
    EnhancedTouchSupport.Enable();
}
Finally, add the following code to Update to start tracking touch actions:
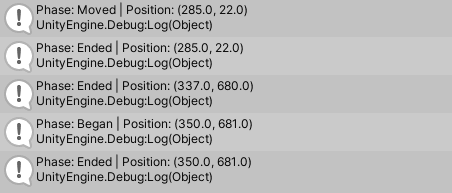
if (Touch.activeFingers.Count == 1)
{
    Touch activeTouch = Touch.activeFingers[0].currentTouch;

    Debug.Log($"Phase: {activeTouch.phase} | Position: {activeTouch.startScreenPosition}");
}
Save your changes and return to the Unity editor.
Touch properties
A finger is active if it’s currently touching the screen. You can access all active fingers by looping through the Touch.activeFingers array. Each active finger has a currentTouch property. The currentTouch property gives you detailed information on the touch action that occurred.
You can filter on the count or index of a finger. By limiting the count of activeFingers to one, you ensure Debug.Log only executes when one finger touches the screen.
If you have a touchscreen monitor, you can run your project in the editor. Otherwise, build and run to a mobile device. Try touching multiple fingers on the screen and notice no debug logs print in the console for them.
There are several useful properties associated with each Touch via the TouchControl type.
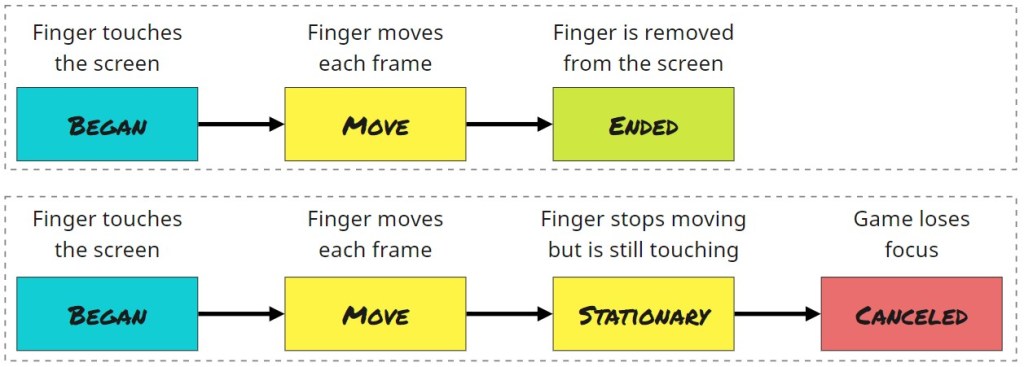
Phases
Phases give you a high-level understanding of what the input system believes happened. A touch action can have six phases:
- Began: The initial start of a touch. This only occurs once and triggers when a finger first touches the screen.
- Moved: The active touch changes position.
- Stationary: The active touch hasn’t moved in a frame.
- Canceled: The active touch ends in a way other than through user interaction. This happens if focus moves away from the app while a touch is ongoing.
- Ended: The active touch is completed. This occurs when the finger lifts from the screen. If there are multiple active touches, only the last one will have this phase.
- None: No activity occurred.
Here’s a diagram showing the phases for two common workflows:
Position
Three key properties help determine where the finger is currently touching and how much it’s moved since the last frame:
- startScreenPosition: The screen space position where the touch first started.
- delta: The difference in position since the last frame. You can get a normalized direction as well as the magnitude through sub properties of delta.
- screenPosition: The current position of the touch. It doesn’t match
With this in mind, it’s time to focus on the camera setup.
The camera setup and movement
Building a good camera setup can be quite complicated, depending on the type of game you’re creating. In this demo, the camera behaves as it would in an isometric game. There are two ways the player can interact with the camera:
- Use a single finger to move around the scene.
- Pinch two fingers to zoom in and out.
The project comes equipped with a camera rig ready to go. All you need to do is gather input from the player and send it to the CameraController script for processing.
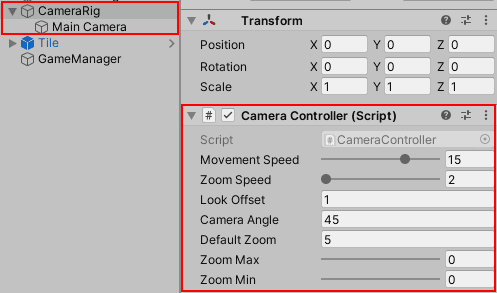
Open up CameraController and familiarize yourself with its contents. The key points to know are:
- Awake: Sets the default position, rotation and focal point based on the properties provided.
- Update: Smoothly moves and zooms the camera each frame.
- UpdateCameraTarget: Calculates the new target position and rotation.
- Move: Sets the camera rig’s new target position.
- Zoom: Manages the zoom level of the actual camera in increments of half a meter.
Moving the Camera
The player can only move the camera if a single finger is touching the screen. If that condition passes, then InputManager needs to determine if the finger moved to a new location on the screen. If the finger moved, the new position goes to CameraController.Move.
Note: The Camera Rig moves little by little each frame via Vector3.Lerp. Time.DeltaTime and MovementSpeed combine to determine how fast to move the Camera Rig. You can adjust MovementSpeed to impact how quickly the camera moves to the new target position.
Open the InputManager script and add the following using statement below the existing using statements:
using TouchPhase = UnityEngine.InputSystem.TouchPhase;Next, add a new global variable right above the Awake method:
public float touchSpeed = 10f;Then, add a new MoveCamera method right below the existing Update method:
private void MoveCamera(Touch touch)
{
    //1
    if (touch.phase != TouchPhase.Moved)
    {
        return;
    }

    //2
    //
    Vector3 newPosition = new Vector3(-touch.delta.normalized.x, 0,
      -touch.delta.normalized.y) * Time.deltaTime * touchSpeed;

    //3
    CameraController.Instance?.Move(newPosition);
}
Here’s a step-by-step breakdown:
- It ensures remaining logic only executes if the finger is actively moving by checking for TouchPhase.Moved. Phases are great for ensuring logic only executes when a specific action is taken.
- Then it calculates the new camera position based on the current touch position and desired touch speed.
- Finally, it passes the new target position to the camera for calculation.
While the newPosition calculation looks complicated, it’s quite simple. It’s based on two key values:
- touch.delta.normalized: A normalized value guarantees the amount is always somewhere between zero and one. This is useful for determining direction without taking the distance measurement into account.
- Time.deltaTime \* TouchSpeed: Used to calculate the distance the touch input has traveled. Using Time.deltaTime and TouchSpeed ensures a consistent experience.
Finally, you need to remove the testing logic you added to Update earlier. In Update, replace all the code inside the if (Touch.activeFingers.Count == 1) statement with
MoveCamera(Touch.activeTouches[0]);Checking that Touch.activeFingers.Count is equal to one ensures only one finger is on the screen before calling MoveCamera. Save your changes and run or build the game. Then touch the screen to see the camera move. Try adjusting the Touch Speed property in the inspector to see how it impacts the movement.
Now that the player can move the camera, it’s time to work on zooming.
Zooming the camera
As mentioned above, the player can zoom the camera by making a pinching motion with their fingers. Moving the fingers closer together zooms out, while moving them further apart zooms in. You’ll add this motion next. Add a new class variable to InputManager above the Awake method:
private float lastMultiTouchDistance;Then add a ZoomCamera method below the MoveCamera method:
private void ZoomCamera(Touch firstTouch, Touch secondTouch)
{
    //1
    if (firstTouch.phase == TouchPhase.Began ||
      secondTouch.phase == TouchPhase.Began)
    {
        lastMultiTouchDistance = Vector2.Distance(firstTouch.screenPosition,
          secondTouch.screenPosition);
    }

    //2
    if (firstTouch.phase != TouchPhase.Moved ||
      secondTouch.phase != TouchPhase.Moved)
    {
        return;
    }

    //3
    float newMultiTouchDistance = Vector2.Distance(firstTouch.screenPosition,
      secondTouch.screenPosition);

    //4
    CameraController.Instance?.Zoom(newMultiTouchDistance <
      lastMultiTouchDistance);

    //5
    lastMultiTouchDistance = newMultiTouchDistance;
}
On the surface, zooming may seem complicated. But fear not, the logic is simple! The ZoomCamera determines if the player pinches their fingers closer together or further apart. Here’s how it works:
- It confirms whether this is the first time a second finger has touched the screen.
- Then it makes sure the remaining logic only executes if both fingers are actively moving.
- Next, it calculates if fingers are pinching together or apart. lastMultiTouchDistance and newMultiTouchDistance store the distance between the two fingers.
- Then it calls the zoom method on the camera, specifying if it’s zooming in or out.
- Finally, it sets the lastMultiTouchDistance amount for the next time the method runs.
Now it’s time to hook up a call to ZoomCamera. Add an else if statement to Update. Replace the contents of the Update method with the following:
if (Touch.activeFingers.Count == 1)
{
    MoveCamera(Touch.activeTouches[0]);
}
else if (Touch.activeFingers.Count == 2)
{
    ZoomCamera(Touch.activeTouches[0],
      Touch.activeTouches[1]);
}
Touch.activeFingers.Count == 2 means two fingers are on the screen, and you can assume they’re attempting to zoom. That’s it! Save your changes, run your game and pinch your fingers to see the camera in action.
Now that you’ve added the touch input camera controls, it’s time to add some new features!
Set up the UI for building placement
I’ve been playing many strategy games lately, which got me thinking: Wouldn’t it be fun to give the player the ability to build with the new Input System? So, that’s what you’re going to do for the final part of this tutorial! Here’s how it’ll work:
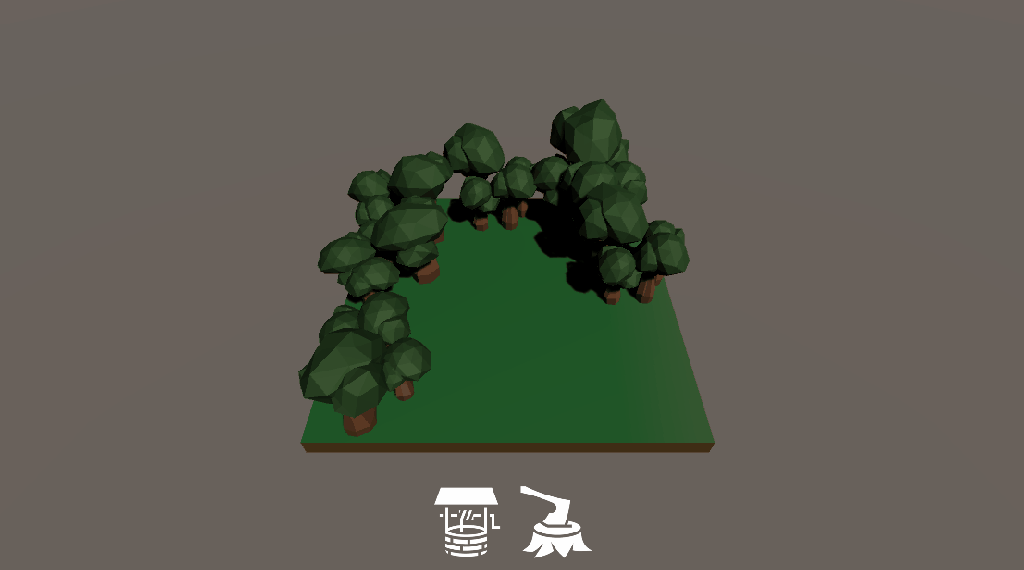
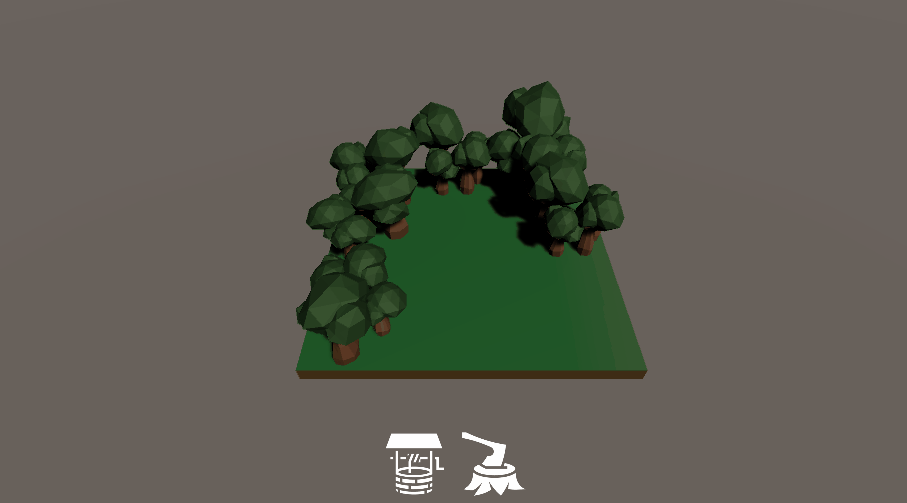
- The UI has two icons the player can choose. They can build a woodcutters lodge or a well.
- The player taps an icon to instantiate the associated prefab in the scene.
- Then, they place the prefab by dragging their finger to any spot within the Tile game object.
- If the player removes their finger when it isn’t over the Tile game object, the prefab is destroyed.
Now, you’ll start by setting up the UI.
Setting up the user interface
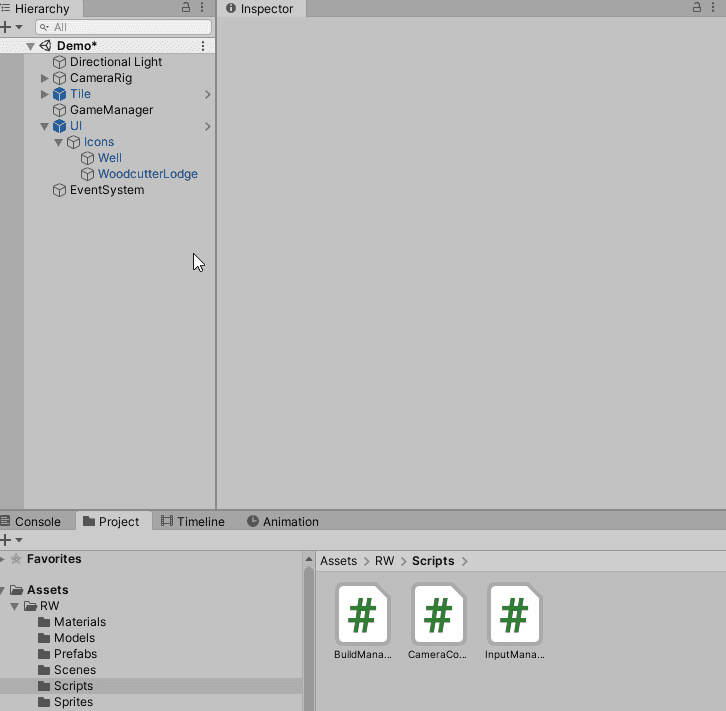
The starter project includes a UI prefab with the icons and layout already set up. You only need to add the event logic. First, add the missing game objects to the scene:
- Drag the UI prefab from WUG/Prefabs into the scene.
- Then select GameObject ▸ UI ▸ Event System from the top menu.
- Next, click the Replace with InputSystemUIInputModule button, located on the EventSystem ▸ Standalone Input Module component.
- Finally, change Pointer Behavior to Single Unified Pointer.
Note: The Replace with InputSystemUIInputModule button only appears if the new Input System package is installed.

Before you go any further, lets take a closer look at the Input System UI Input Module.
A Deeper look at Input System UI Input Module
Input System UI Input Module replaces Standalone Input Module, which is how the legacy input system communicates with the UI. Using the new component lets the new Input System communicate with UI events.
Note: You can read more about the Input System UI Input Module here.
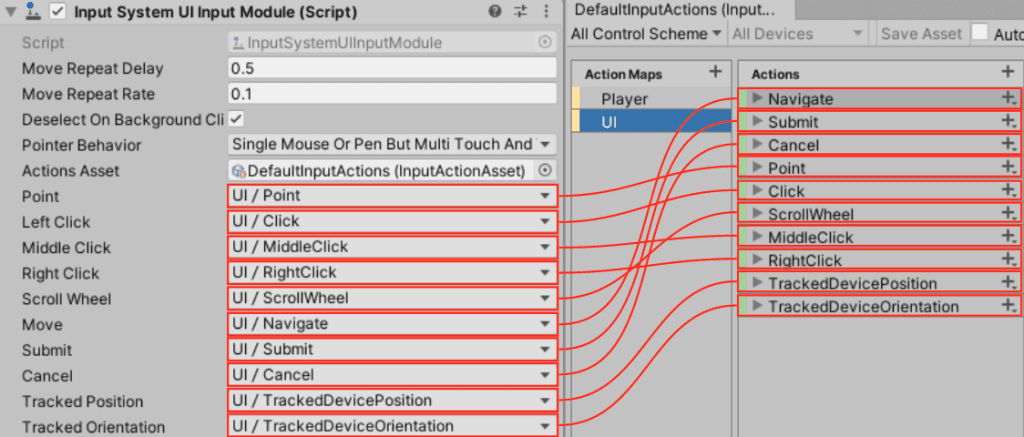
You can configure several properties on the Input System UI Input Module. Here’s a quick explanation of each:
- Move Repeat Delay: The initial delay, in seconds, between generating an initial OnMove event and repeated events.
- Move Repeat Rate: The interval, in seconds, between generating repeat events when the Move event remains activated.
- Deselect on Background Click: Sets whether the current selection clears when a click happens that doesn’t hit any GameObject.
- Pointer Behavior: How to deal with multiple pointers feeding input into the UI.
- Actions Asset: An Input Action Asset containing all the Actions to control the UI. It defaults to a built-in asset.
Note: Move is a standard UI event. You can read more about UI events here.
The remaining properties let you map UI events to the input mappings defined in the Action Asset. Here’s a look at the default mapping:
Pointer behavior
Pointer Behavior determines how the Input System routes input into the UI if many input devices are available. You can choose from three options:
- All Pointers As Is: Treats all devices as independent pointers.The type of pointer is transparent to the system. Many pointers can be active at the same time.
- Single Mouse Or Pen But Multi Touch And Track: Treats any input that isn’t Touchscreen or TrackedDevice as a single unified pointer. This is the default behavior.
- Single Unified Pointer: Routes all input from all pointing devices into a single instance.
Earlier you changed the Pointer Behavior property from Single Mouse Or Pen But Multi Touch And Track to Single Unified Pointer. I tested on a laptop that has both a mouse and a touch screen. With the default value, I found my touches don’t register on the UI.
Now that you’ve learned how the Input System works with the UI, move on to the fun stuff!
Gather the building input
The project already includes a BuildManager script. Again, take a moment to look at what each method does. Here’s a breakdown of the key points:
- Awake: Makes sure there’s only one instance of the script in the scene.
- Update: If building, it smoothly moves the prefab each frame.
- Build: Instantiates the prefab into the game world.
- MoveAsset: Calculates the new location of the prefab.
- PlaceAsset: Places the model in the world if it has a valid location, a world tile.
- CalculatePosition: Calculates and sets the target position for the model to lerp to.
Most of these methods work behind the scenes. The only two you need to interact with are MoveAsset and Build. InputManager calls MoveAsset. The UI Event System calls Build. Now that you understand how BuildManager operates, it’s time to add the last bit of code to InputManager.
Gathering the input
InputManager interprets the players intent through their touch actions. There are three stages in total:
- Start Build: A UI OnPointerDown event that starts the building process. It passes the details to BuildManager.Build.
- Drag: Determines if a touch drag has occurred, and if so, passes the value to BuildManager.MoveAsset.
- Complete Build: Disables build mode. Passes the details to BuildManager.PlaceAsset.
Add each of the stages. First add a new class variable above the Awake method:
private bool isBuilding;Second, add a new method:
public void StartBuildOnPointerDown(GameObject model)
{
    if (Touch.activeTouches.Count == 0)
    {
        return;
    }

    isBuilding = true;

    BuildManager.Instance?.Build(model,
      Touch.activeTouches[0].screenPosition);
}
StartBuildOnPointerDown is called through an Event Trigger setup on the Well and WoodCutterLodge UI game objects. If the finger is still touching the screen, then isBuilding is set to true for tracking. It wraps up by passing the model and screenPosition of the finger to BuildManager.Build for processing. Finally, add the DragAsset and CompleteBuild methods:
public void DragAsset(Touch touch)
{
    if (touch.phase != TouchPhase.Moved)
    {
        return;
    }

    BuildManager.Instance?.MoveAsset(touch.screenPosition);
}

public void CompleteBuild()
{
    isBuilding = false;
    BuildManager.Instance?.PlaceAsset();
}
Here’s what these methods do:
- DragAsset is a pass through method. It uses TouchPhase.Moved to confirm the finger moved during the frame. Then it passes the new screenPosition to BuildManager.MoveAsset for processing.
- CompleteBuild is only called if the finger leaves the screen. It toggles off build mode and notifies BuildManager.
There’s one final change: You need to update Update. :\] Replace all the code in Update with the following:
//1
if (Touch.activeFingers.Count == 1)
{
    if (isBuilding)
    {
        DragAsset(Touch.activeTouches[0]);
    }
    else
    {
        MoveCamera(Touch.activeTouches[0]);
    }
}
//2
else if (Touch.activeFingers.Count == 2)
{
    ZoomCamera(Touch.activeTouches[0], Touch.activeTouches[1]);
}
//3
else if (Touch.activeFingers.Count == 0 && isBuilding)
{
    CompleteBuild();
}
Now Update looks for three key conditions:
- One finger is touching: The player is either trying to Move the camera or drag a prefab for building.
- Two fingers are touching: The player is trying to zoom.
- No fingers are touching and they were building: They are trying to place an object.
Save your changes and return to the Unity editor.
Finish setting up the user interface
The Event Trigger component is wonderful for interacting with all the UI’s events. You’ll use the Event Trigger component to call BuildManager.Build during the PointerDown event. Here’s how to set it up:
- Add the
BuildManagerscript as a new component to GameManager.
- In the Hierarchy window, go to UI ▸ Icons ▸ Well.
- Click Add Component and search for Event Trigger.
- Then click Add Event Type and choose PointerDown.
- Click the + button to add a new item to the list.
- Set the GameObject reference to GameManager.
- Change the No Function drop down to InputManager ▸ StartBuildOnPointerDown.
- Set the parameter that appears to the Well prefab.
- Repeat for the WoodCutterLodge game object. Make sure to set the parameter to the WoodCutterLodge prefab instead.
That’s it for the initial set of build logic. Run the project and try building. You should notice a sneaky little bug or two.
Fixing the bugs and adding polish
Currently, you have two bugs. The prefab isn’t instantiated at the finger and is destroyed when placed on a world tile. These bugs occur because BuildManager expects a different scene setup. Look back at BuildManager.CalculatePosition and you’ll see it has a Raycast looking for two layers. It expects World, Layer 9, and TouchPlacement, Layer 8. The Tile game object is set to World, but the scene doesn’t have a game object set to TouchPlacement. Add it and see how this impacts the behavior:
Right click the CameraRig ▸ Main Camera and select 3D Object ▸ Quad.
- Name the newly created game object AssetPlacementHelper.
- Set the position to (x: 0, y: 1.8, z: 5).
- Then set the rotation to (x: 45, y: 0, z: 0).
- Set the scale to (x: 16, y: 20, z: 1).
- Next, set the Layer to 8: TouchPlacement.
- Remove the Mesh Renderer component.
Asset Placement Helper adds a bit of polish. Without it, and with different CalculatePosition logic, the prefab would still follow your finger. In that case it wouldn’t follow on a higher Y-axis when not over Tile. That’s it! Push play, or build, to see what happens. Everything now works as expected.
Challenge: Upgrade a placed building
With the knowledge you’ve learned, you’re ready for your first challenge! Try extending the building behavior to upgrade a placed building. Here’s how the logic could work:
- The player single taps on a placed building to enter upgrade mode. The UI icons change as a result.
- The player has to single tap one of the new UI icons to upgrade the building.
- The placed building’s model is now swapped out with the upgraded model.
- The game exits upgrade mode.