Improve retention by storing player data in the cloud
Storing player and save data in a cloud service is a simple and effective way to enhance player retention in your game. By allowing players to access their progress from any device and protecting their data from loss in the event of an uninstall or device reset, you can provide a seamless and uninterrupted gaming experience, ultimately keeping players engaged and coming back for more. Having access to the data also lets you test updates and patches on real world data – reducing the likelihood of introducing breaking changes.
In this tutorial you will learn how to read, write, and validate player data using the free tier of Unity Gaming Service’s Cloud Code and Cloud Save products.
Learning Objectives
You’ll learn many concepts, such as how to:
- Create a new cloud project with Unity Gaming Services
- Use UGS antonymous authentication
- Read and write data directly to Cloud Save
- Setup a Cloud Code script with custom parameters
- Use Cloud Code to store player data in Cloud Save
Prerequisites
- You will need Unity 2022.2 or later to follow along. (This tutorial may work with older versions, but is not guaranteed.)
- This tutorial assumes you already have intermediate knowledge of Unity, C# and JavaScript.
References
Getting Started
This tutorial comes with a starter project that you will use to add the service functionality. To get started, make sure to either clone or download the starter project, which is on the GitHub repository.
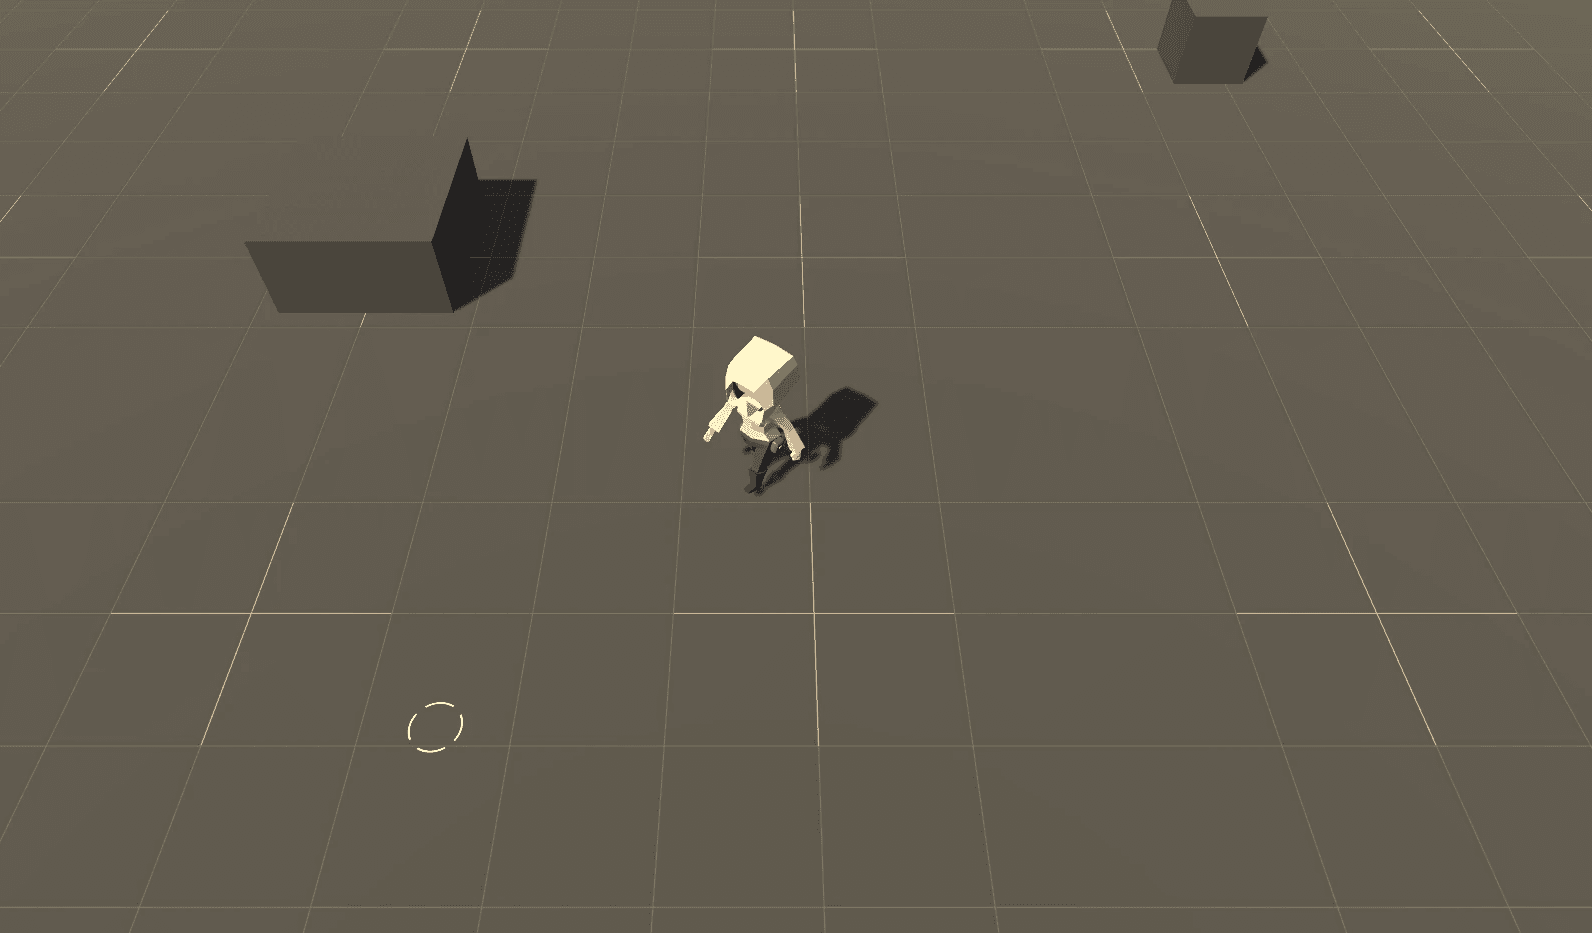
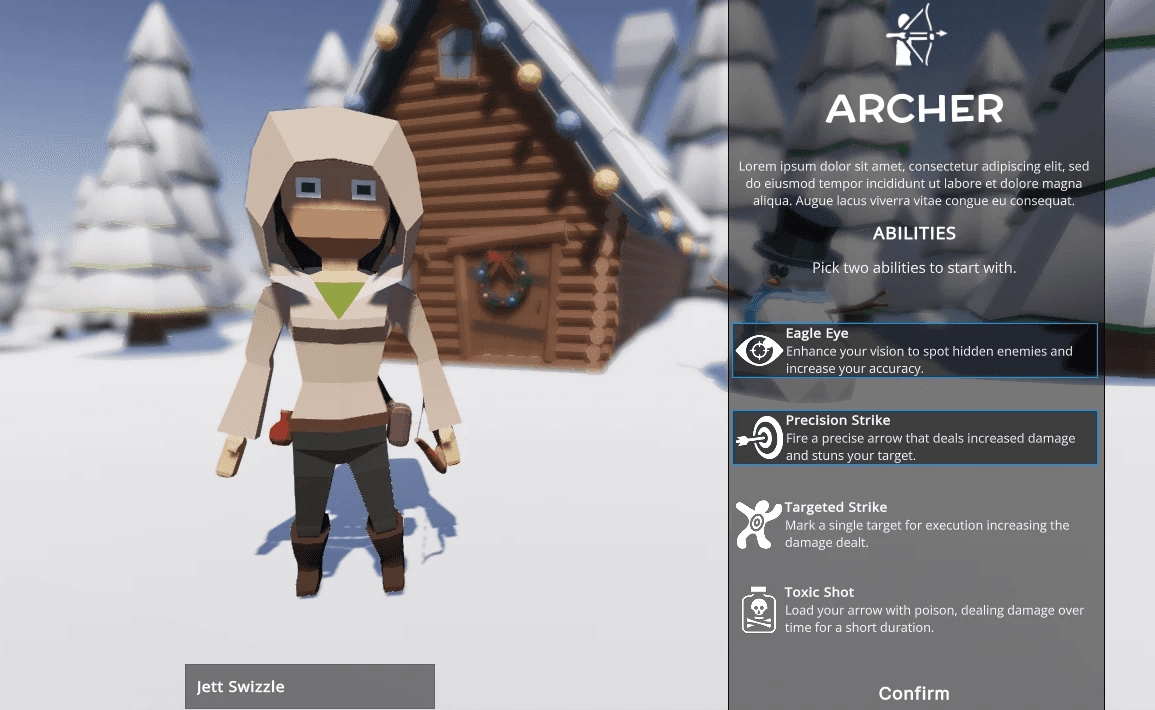
Open the project to view the standard assets under the Assets/GDR folder, which include fonts, materials, models, prefabs, scenes, and sprites. Open the Demo scene located under GDR/Scenes and press play. Create a new character by entering a name, choosing two abilities, and pressing confirm.
Note: Check out the Create a runtime inventory UI with UI Toolkit if you want to learn more about UI Toolkit and/or UI Builder.
Setup Unity Gaming Services
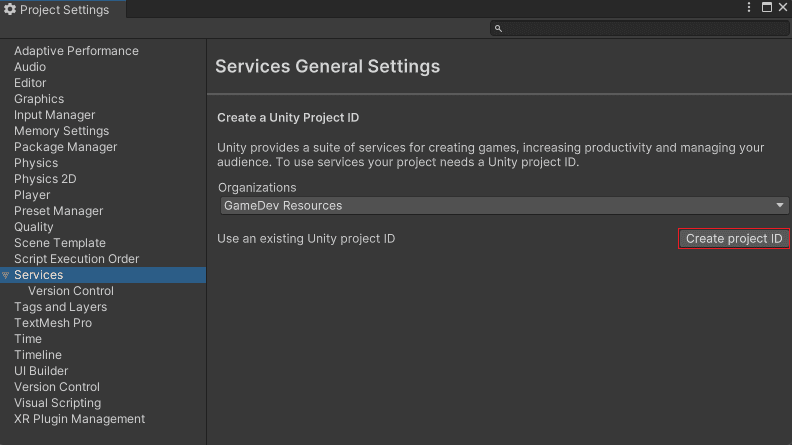
Unity Gaming Services (UGS) has over 15 different products that can help streamline different aspects of your game. It operates on a pay-as-you-go model and has an outstanding free tier, in my opinion. To get started, create a Unity Dashboard Project ID by either accessing the Unity Dashboard or directly from your Unity project. If your organization is already created, setting up the Project ID directly in your project is a breeze. Go to Edit \> Project Settings, choose the Services tab, select your organization, and click Create Project ID.
Note: See Creating and editing Organizations if you need to create a new organization.
Configure your environments
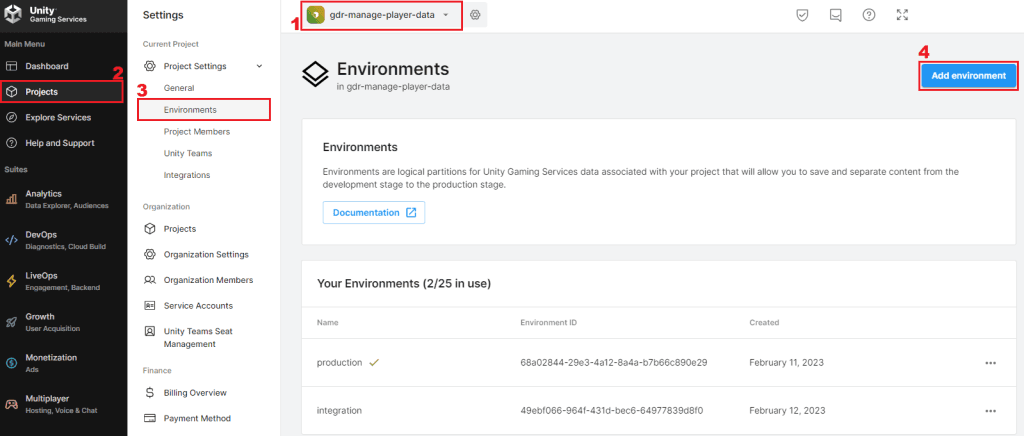
A very powerful feature of Unity Gaming Services is the ability to manage different environments for the services. Each environment acts as an isolated sandbox for service configuration and data, allowing you to experiment and test your code and features without impacting live users or data. Your projects come with a default Production environment, but you can add more through the Unity Dashboard. To create an integration environment, follow these steps in the Unity Dashboard:
- Choose your project from the project drop-down menu at the top of the window.
- Go to the Projects section in the main navigation.
- Select Environments in the sub-navigation.
- Click the Add Environment button on the top right and name it integration.
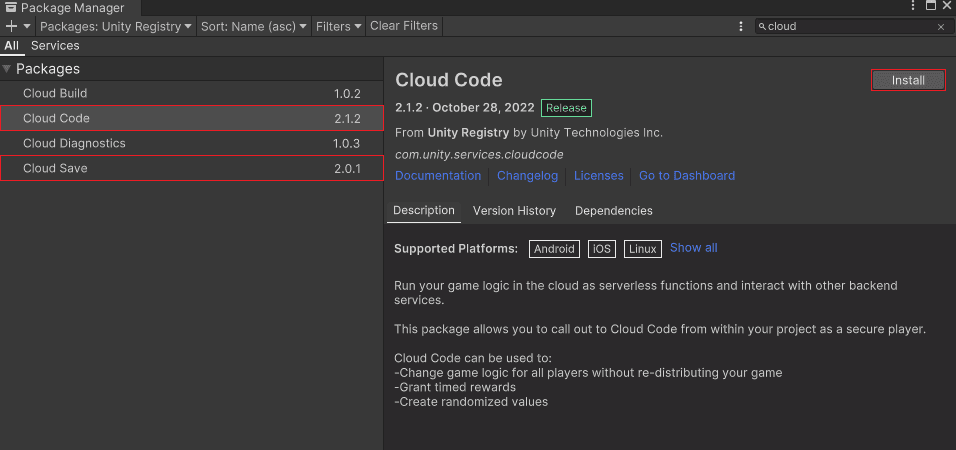
Install Cloud Save and Cloud Code
Cloud Code and Cloud Save are installed through the package manager. Navigate to Window \> Package Manager, search for “Cloud,” locate each package, and click “Install.” The Unity Gaming Service’s Authentication service acts as a dependency for both packages, so it will install as well.
Authenticate the player
You can set up authentication with the Unity Gaming Services in three ways: by using an existing identity provider (e.g., Google, Facebook, Steam, etc.), signing in anonymously, or building a custom flow with OpenID. This tutorial will cover the flow of anonymous sign in. Anonymous sign in resembles having a guest sign in for your game as the player doesn’t need to provide credentials or create a user profile. It’s an excellent way to get the player started quickly and works well as long as the player does not change or clear their device.
Note: Anonymous sign in should not be the only authentication method that you build into your game as it limits your ability to support cross-device workflows. Learn about Unity Gaming Service’s recommended authentication flow by reading more here.
Create a script named “CloudController” and add the following code to it:
using Unity.Services.CloudSave;
using Unity.Services.Core;
using Unity.Services.Authentication;
using UnityEngine;

public class CloudController : MonoBehaviour
{
    async void Start()
    {
        var options = new InitializationOptions();
        options.SetOption("com.unity.services.core.environment-name", "integration");

        await UnityServices.InitializeAsync(options);
        await AuthenticationService.Instance.SignInAnonymouslyAsync();

        Debug.Log(AuthenticationService.Instance.IsAuthorized
            ? "Sign in Successful"
            : "Issue Authenticating. Are you connected to the internet?");
    }
}
This code initializes the UnityServices with specific options and attempts to sign in the user anonymously into the Unity Gaming Services (UGS) Authentication. InitializationOptions is used to set the service environment to integration. After the sign-in process, the code checks if the user is authorized to use the service by checking the value of AuthenticationService.Instance.IsAuthorized.
Note: Another approach to checking for success is to register callback methods with AuthenticationService.Instance.SignInFailed and AuthenticationService.Instance.SignedIn.
Create a new game object in Unity called Cloud Services and add the CloudController script as a new component. Push play and you should see a debug message appear that confirms sign in was successful.
Save player data via Cloud Save
With Cloud Save, you can store a range of data types, including JSON. However, it’s important to note that there are limitations on the size and amount of data that can be stored. In this tutorial you will send a string, integer, and JSON for the character data. Create a new Player class to track the data:
[System.Serializable]
public class Player
{
    public string Name;
    public string Class;
    public string[] Abilities;
    public int Experience;
}
Next, add two global variables and one new method to the CloudServices class:
public enum CloudSaveKeys
{
    Name,
    Class,
    Abilities,
    Experience
}

public Player PlayerDetails;

public static async void SavePlayerData(Player player)
{
    var data = new Dictionary<string, object>();
    var abilities = JsonConvert.SerializeObject(player.Abilities);

    data.Add(CloudSaveKeys.Name.ToString(), player.Name);
    data.Add(CloudSaveKeys.Class.ToString(), player.Class);
    data.Add(CloudSaveKeys.Abilities.ToString(), abilities);
    data.Add(CloudSaveKeys.Experience.ToString(), player.Experience);

    await CloudSaveService.Instance.Data.ForceSaveAsync(data);
}
This SavePlayerData method sends the player data to the Cloud Save service. It takes the player object as an argument and creates a dictionary to store the player’s name, class, abilities (serialized to JSON), and experience. The code then uses the ForceSaveAsync method to save the data to the Cloud Save service asynchronously.
When the player clicks the “Continue” button in the demo project, the settings will be seamlessly sent to Cloud Save for safekeeping. To accomplish this, open the CharacterCreationScreen class and add the following code to the ConfirmButton_Clicked function:
private void ConfirmButton_Clicked(MouseDownEvent e)
{
var playerDetails = new Player()
{
Name = _playerName.text,
Class = "Archer",
Abilities = _selectedAbilities.Select(x => x.Name).ToArray(),
Experience = 1
};
CloudController.SavePlayerData(playerDetails);
Debug.Log("Confirm button clicked");
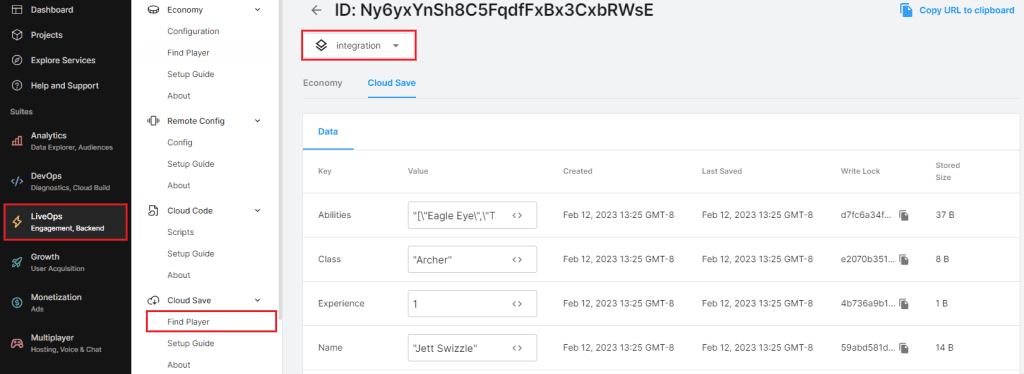
}When you’re ready to proceed, select two abilities and name your player. Then, click the continue button and you should see a message in the console confirming the action. Want to see your saved data in action? Head on over to the Unity Dashboard and follow these steps:
- Open the Unity Dashboard and navigate to LiveOps \> Cloud Save \> Find Player.
- Change the environment from Production to Integration. You should see the record listed.
- Click the Player Id and select the Cloud Save tab to view the saved data.
Load player data via Cloud Save
Next, you will read player data out of cloud save and store it in the player object. Add a new method to the CloudServices class and update Start:
async void Start()
{
    //Original code above here
    LoadPlayerData();
}

public async void LoadPlayerData()
{
    if (!AuthenticationService.Instance.IsAuthorized)
    {
        return;
    }

    HashSet<string> keys = new HashSet<string>
    {
        CloudSaveKeys.Name.ToString(),
        CloudSaveKeys.Experience.ToString(),
        CloudSaveKeys.Abilities.ToString(),
        CloudSaveKeys.Class.ToString()
    };

    Dictionary<string, string> data = await CloudSaveService.Instance.Data.LoadAsync(keys);

    if (data.Count == 0)
    {
        return;
    }

    if (!int.TryParse(data[CloudSaveKeys.Experience.ToString()], out int experience))
    {
        //Put error handling logic here as the value can't be parsed
    }

    PlayerDetails = new Player()
    {
        Name = data[CloudSaveKeys.Name.ToString()],
        Class = data[CloudSaveKeys.Class.ToString()],
        Experience = experience,
        Abilities = JsonConvert.DeserializeObject<string[]>(data[CloudSaveKeys.Abilities.ToString()]),
    };
}
LoadPlayerData first checks if the user is authorized, and if they are not, the function returns without loading any data. If the user is authorized, the code creates a list of keys (Name, Experience, Abilities, and Class) that correspond to the player data stored in the Cloud Save service. It then calls the LoadAsync method to load the data associated with the specified keys. The loaded data is then parsed and used to create a new instance of the Player class with the properties of Name, Class, Experience, and Abilities. The code also includes error handling logic in case the value for experience cannot be parsed as an integer.
Get ready to load in your saved player data! Push play in the editor, and marvel as your saved information comes to life before your eyes. Click on the Cloud Services game object to see all the details you saved, including the player name, experience, class, and abilities.
Save data via Cloud Code
Cloud Code is a powerful tool that offers a flexible and convenient way to run server-side code. It is stateless, meaning that it doesn’t retain any information between executions, and runs on fully managed infrastructure. This eliminates the need for you to manage your own servers and reduces the risk of downtime. Cloud Code is incredibly useful for a variety of tasks, such as granting daily rewards, distributing loot boxes, and preventing cheating.
Instead of communicating directly with the Cloud Save service, you can use Cloud Code to validate data and add player data for new characters. This helps ensure the integrity and consistency of your game data and offers a streamlined approach to managing your game’s server-side functionality.
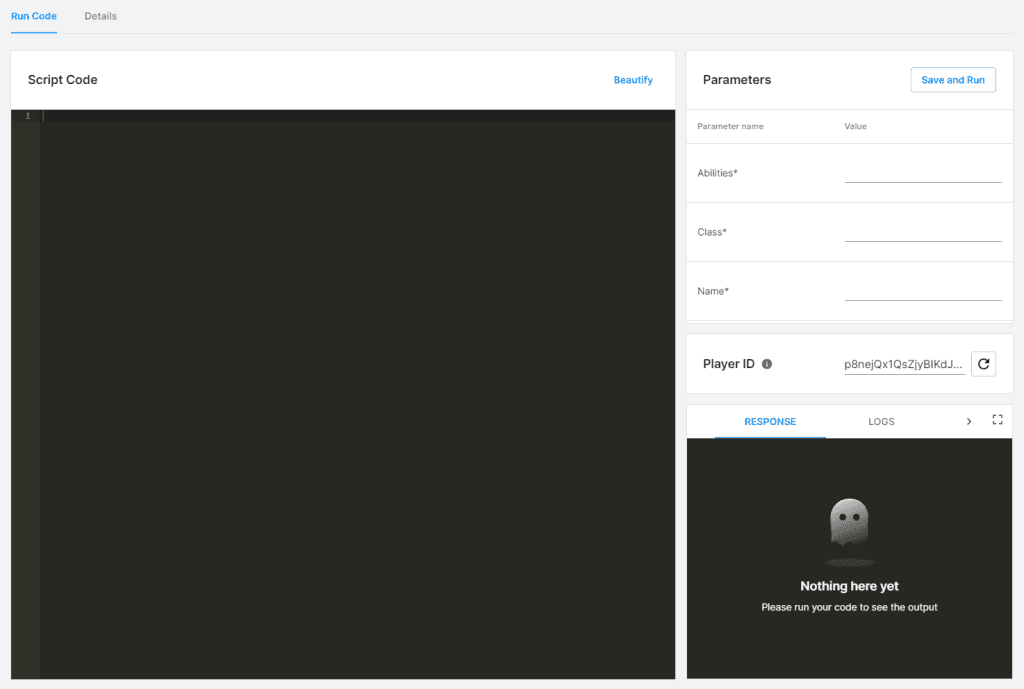
Getting started with Cloud Code in Unity is a simple process that can be accomplished within the Unity Dashboard. To do this, open the Unity Dashboard and go to the LiveOps \> Cloud Code \> Scripts section. Click Add Script and name it CreateNewPlayer. Add three parameters with the following settings:
- {Parameter Name: Name, Type: String }
- {Parameter Name: Class, Type: String }
- {Parameter Name: Abilities, Type: JSON }
Note: Make sure you are creating your new script in the integration environment.
Upon creating a Cloud Code script, you will be taken to the editing page where you can customize and fine-tune your code. It is important to be aware of the four sections available in the page. The Script Code section is where you will write your Cloud Code using JavaScript. During testing, the values you enter in the Parameters section will be referenced in the script. The Player ID section will generate a new player token automatically for testing purposes. Finally, the Debugging section, which includes the Response, Logs, and Request sections, is a valuable tool for debugging your code. The Response section shows the result from the server, the Logs section records any messages from your code, and the Request section displays the client’s request for information from the server.
Replace the default code in the Script Code section with the following:
const _ = require("lodash-4.17");
const { DataApi } = require("@unity-services/cloud-save-1.2");

const NUMBER_OF_ABILITIES = 2;
const EXPERIENCE = 1;

const CLOUD_SAVE_KEY_NAME = "Name";
const CLOUD_SAVE_KEY_EXPERIENCE = "Experience";
const CLOUD_SAVE_KEY_ABILITIES = "Abilities";
const CLOUD_SAVE_KEY_CLASS = "Class";

module.exports = async ({ params, context, logger }) => {

  const { projectId, environmentId, playerId, accessToken } = context;

  //Instantiate the CloudSave API
  const cloudSave = new DataApi({ accessToken });

  //Check the amount of abilities and make sure it is not more than the allotted amount
  if (JSON.parse(params.Abilities).length > NUMBER_OF_ABILITIES) {

    logger.error("Too many abilities. Limit is " + NUMBER_OF_ABILITIES);

    return false;
  }

  // Validation passed so send the data to cloud save
  await cloudSave.setItemBatch(projectId, playerId, {
    data: [
      { key: CLOUD_SAVE_KEY_NAME, value: params.Name },
      { key: CLOUD_SAVE_KEY_EXPERIENCE, value: EXPERIENCE },
      { key: CLOUD_SAVE_KEY_ABILITIES, value: params.Abilities },
      { key: CLOUD_SAVE_KEY_CLASS, value: params.Class }
    ]
  });

  return true;
};
The code makes use of two dependencies, lodash-4.17 and @unity-services/cloud-save-1.2. The DataApi class from the latter package is used to interact with a cloud save service. The function starts by extracting several values from the context object, including projectId, environmentId, playerId, and accessToken. Next, the code creates an instance of the DataApi class with the accessToken. This instance is used to communicate with the cloud save service.
The code then checks if the number of abilities provided in the params.Abilities field is more than the allotted amount of NUMBER_OF_ABILITIES (which is set to 2). If the number of abilities is too high, the code logs an error message and returns false.
If the validation passes, the code uses the setItemBatch method on the cloudSave instance to send data to the Cloud Save service. The data includes the player’s name, abilities, and class, all stored in the params object. It also manually sets the Experience property to 1. The keys for these values are defined as constants at the top of the code, such as CLOUD_SAVE_KEY_NAME, CLOUD_SAVE_KEY_EXPERIENCE, etc. Finally, the code returns true to indicate that the operation was successful.
Refactor Unity to talk to Cloud Code
The last step is to modify Unity so that it communicates with Cloud Code instead of Cloud Save when creating the character. To do this, you will need to update the SavePlayerData function with the following code:
public static async void SavePlayerData(Player player)
{
    var data = new Dictionary<string, object>();
    var abilities = JsonConvert.SerializeObject(player.Abilities);

    data.Add(CloudSaveKeys.Name.ToString(), player.Name);
    data.Add(CloudSaveKeys.Class.ToString(), player.Class);
    data.Add(CloudSaveKeys.Abilities.ToString(), abilities);

    var response = await CloudCodeService.Instance.CallEndpointAsync<bool>("CreateNewPlayer", data);

    Debug.Log($"{response}");
}
Finally, you can run the project within the Unity Editor and input some new values. Verify your updates by visiting the Unity Dashboard Cloud Save data section, or simply start and stop the editor to observe the changes reflected in the CloudService component.